Zoetrope Light and Materials Exploration
Oct 6, 2017 10:08 · 602 words · 3 minutes read
See Part 2 and Part 3 of this project.
For our first project for Designing for Digital Fabrication, we are to create something using the laser cutter, with at least some of the geometry generated algebraically. We have two weeks to complete this.
Inspiration
I searched for inspirations for a project like this and ended up discovering the Zoetrope and being blown away by what people have done with it:
Elliot Schultz’ Embroidered Zoetrope animations:
Retchy’s Zeotropes:
An incredible and wonderfully creative Cake Zoetrope by Alexandre DUBOSC that tells a story:
Project Idea
I want to explore creating a Zoetrope that can have longer animations by activating different parts of the animation with specific light colors. To do this, I would need to have material that has its visibility toggled on or off based on which light color is shown.
Ultimately, I would want to let a user control which part of the animation is shown by changing which color to flash.
Light and Material Exploration
I went to Canal Plastics to pick up a bunch of samples of acrylic material so that I could test how they would appear under different colors of light.
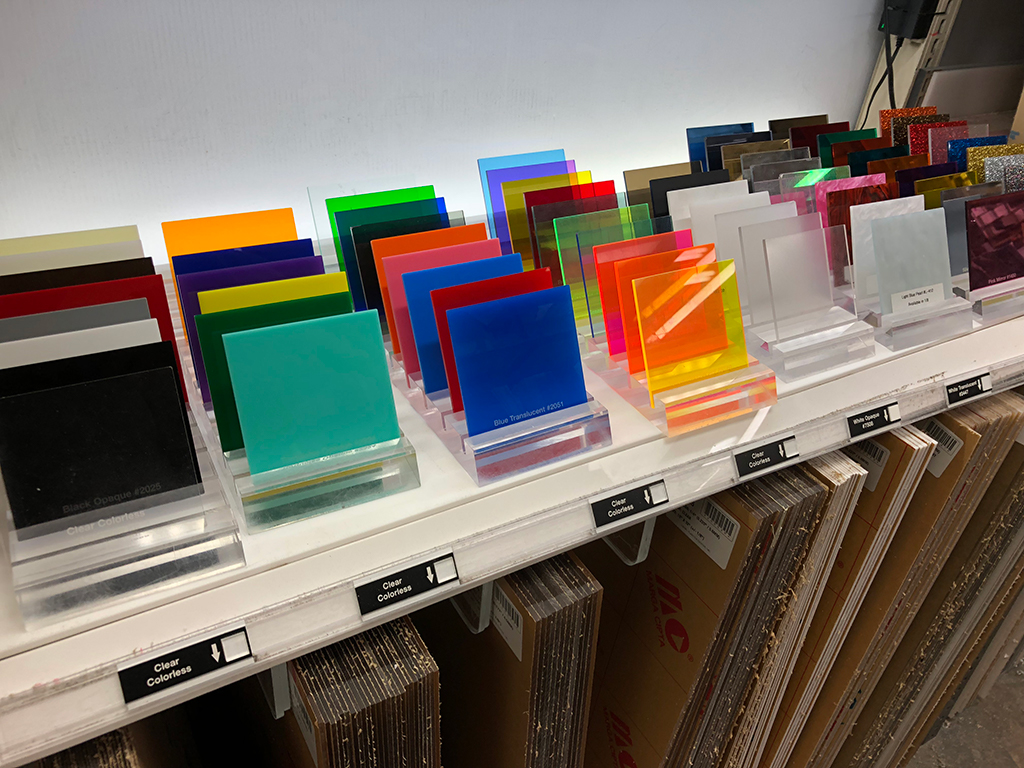
Acrylic Materials at Canal Plastics
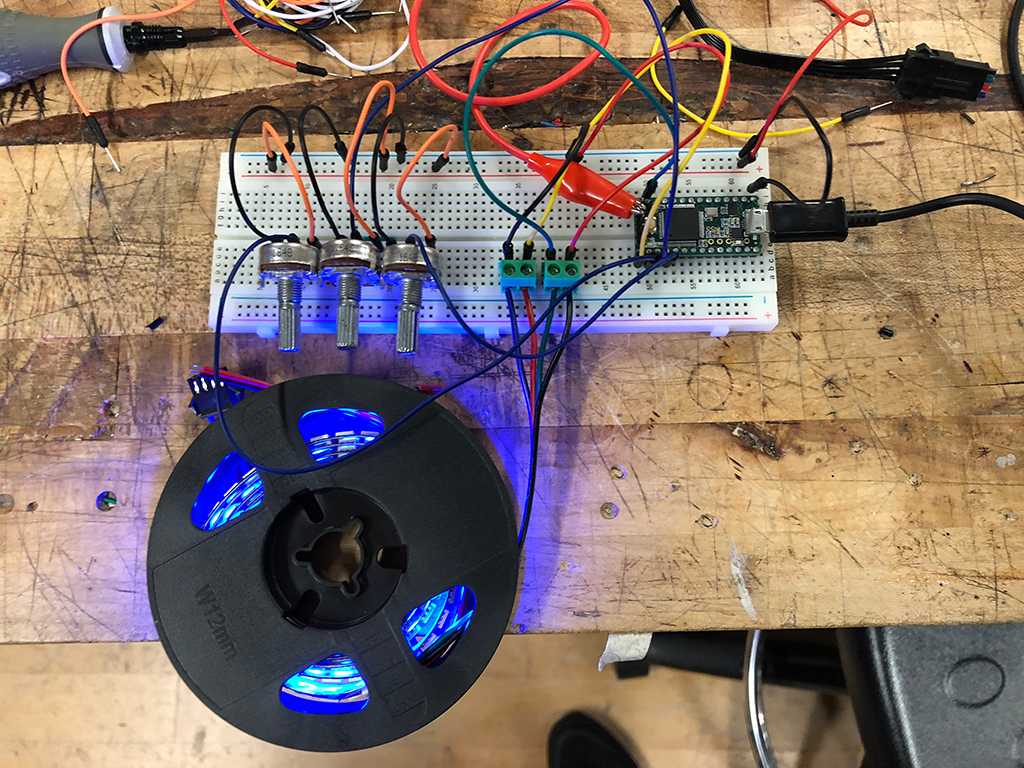
I then built a simple circuit with an Arduino Teensy 3.2, an APA102 led strip (I had one lying around), and some pentiometers that could control the Red, Green, and Blue colors of the strip.
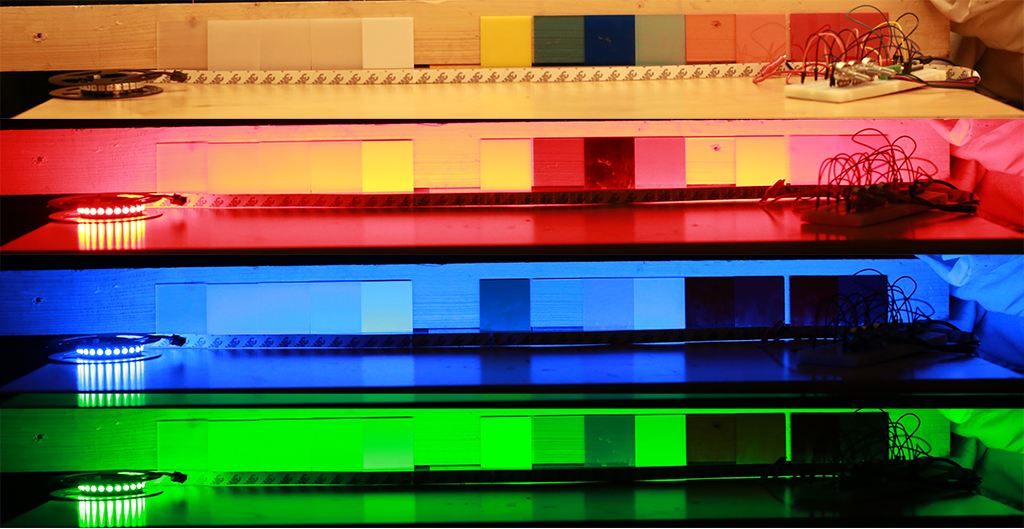
I laid out all the samples in a line with the strip facing the samples:
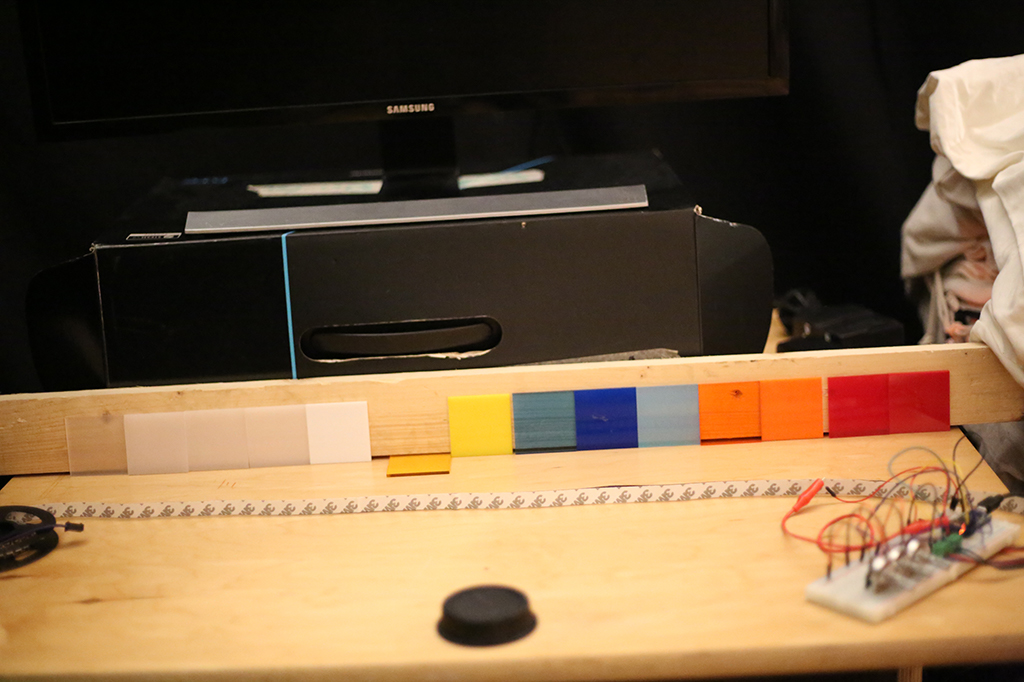
I turned down the lights, and tested how each material reacted to red, green and blue lighting. Here are the results:
Conclusions
All of the variations of white and frosted acrylic picked up each color well.
| Material | Red Lighting | Blue Lighting | Green Lighting |
|---|---|---|---|
| White / Frosted | visible | visible | visible |
| Yellow Opaque | visible | dark | visible |
| Blue Transparent | invisible | invisible | invisible |
| Blue Opaque | dark | visible | mostly dark |
| Turquoise Transparent | visible | visible | visible |
| Orange Transparent | invisible | dark | dark |
| Orange Opaque | visible | dark | dark |
| Red Opaque | visible | dark | dark |
| Red Frosted | visible | dark | dark |
All in all, the opaque materials were the best at appearing in certain light colors and being dark in others. Yellow could be used in parts of the animation that use red and green lighting. Red material can be used to only appear when red lighting is on, and the same goes for blue material and its light. Blue material could also slightly appear in green lighting, since green is partially made up of blue according the color wheel.
Next Steps
I will build this on a turntable, as thats what most people have used successfully and it’s affordable to get one used.
I will protoype getting the animation mechanics correct by experimenting with rpm, light flashing speed, and recording fps with a camera. To do this, I will laser cut simple animations onto cardboard. The animation frames and projection onto a circle will be done using Processing. I will build a simple LED flasher using low-cost rgb leds and an arduino.
After this is figured out, I will try having two different animations on a single disk using both red and blue materials, and be able to control which color of the lights flash on the leds. For simplicity these will be flat, on the disk, in 2d.
Then, if time permits, I will create an animation that appears in 3d by having laser cut elements appended vertically to the disk.
Part 2 - Generating Zeotrope Animations